If you’re reading this post, you’ve probably already started on the journey of acing the popular website speed tests like GTMetrix and Google Page Insights. Finding the perfect combination of host/plugins while not breaking the bank and not breaking your site can be a pain.
I’ve already broken my client’s sites hundreds of times, so you don’t have to break yours.
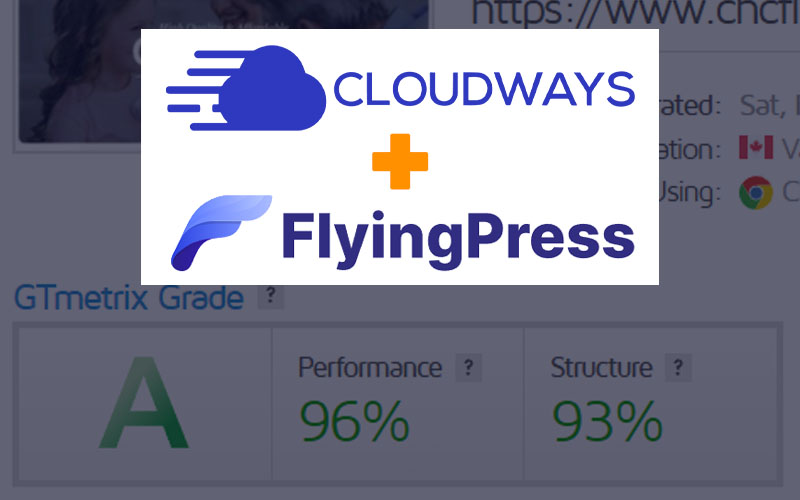
I’ve found THE combination. When configured properly, you can see under 1-second load times (this one loads in under 500ms on a good day, without a CDN).
Speed Up Elementor With Better Hosting and Caching
A great web host, to me, needs to offset some of the cost and maintenance time of plugins you would otherwise need (staging/backups) while providing the best speed possible. If you’ve been around the block, you’re thinking Kinsta! Yes, they are great, but they are also around $30mo per site. I’ve tried many popular choices and found these are the best bang for your buck.
Cloudways Cloudways is my host of choice. I’ll write a whole post in the future on it, but to sum it up, as of the time of writing, it is one of the cheapest, for the least amount of maintenance time required, to get the most amount of tools, and somehow still offer blazing fast servers.
FlyingPress is why we’re here. This is the secret component to getting speed. It’ll likely work well with whatever host you’re currently using, but for this post, I’ve run tests paired with Cloudways VULTR High-Frequency servers.
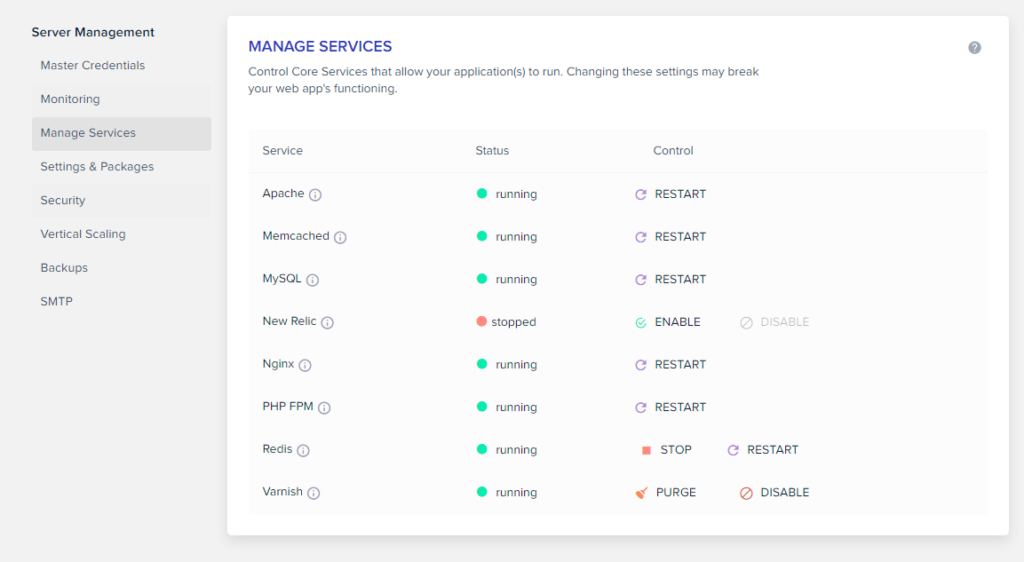
Cloudways Settings
Cloudways offers several server types, but this guide uses the Vultr High-Frequency servers. The lowest tier plan is around $12mo, and you can host several sites. This guide won’t go over launching an application, but if you’ve never done so, it’s a very easy process that even offers a migration tool for importing your site.
- Enable Redis
This can be enabled within the “Manage Services” tab located in your server’s settings. You can read more about Redis on Wikipedia, but in short, it’s another form of caching. - Set Memory Limit to 256MB or greater
This can be changed within the “Settings & Packages” tab from the Server Management area within Cloudways. - Use PHP 8.0 or greater
Depending on the size/traffic of the site, this alone can have a significant performance increase, especially if you’re upgrading from earlier than PHP 7. - Use MariaDB 10.4 or greater
If you’ve been on Cloudways, you’re probably already using MariaDB 10.4 since it’s the minimum allowed, but if you’re migrating a site over, this may change for you.
FlyingPress Settings
FlyingPress offers similar optimizations and improvements as the more popular WPRocket, without bloating/upselling you on the backend. The ‘Delay Scripts on User Interaction’ is the star here, but we’ll get into it further down.
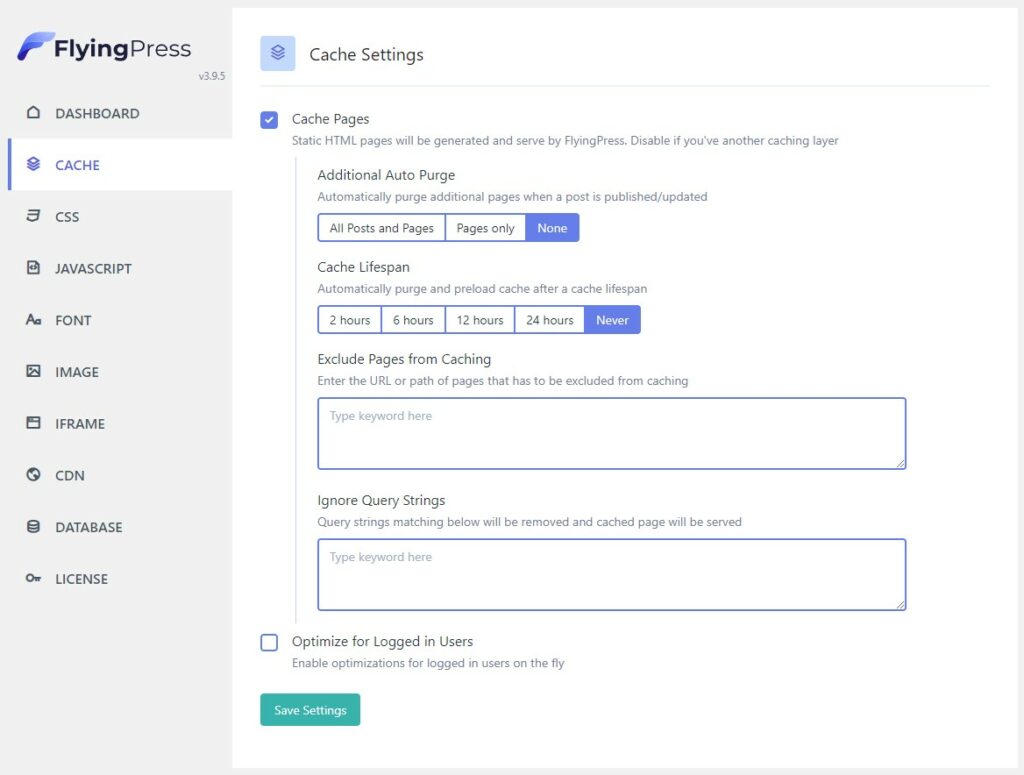
Cache Settings
- Enable Cache Pages
In most cases, you will want this enabled, but if you’re using a CDN that is performing its own caching, it may be best to leave this disabled. - Additional Auto Purge – All Posts and Pages
Additional Auto Purge will determine what gets an automatic cache clear whenever you update content. I manually clear pages as I update them, but I wouldn’t recommend it. - Cache Lifespan – Never
If you’re updating content daily, you may want a lower amount here, but if you’re only updating every few days/weeks, it’s best to leave with never.
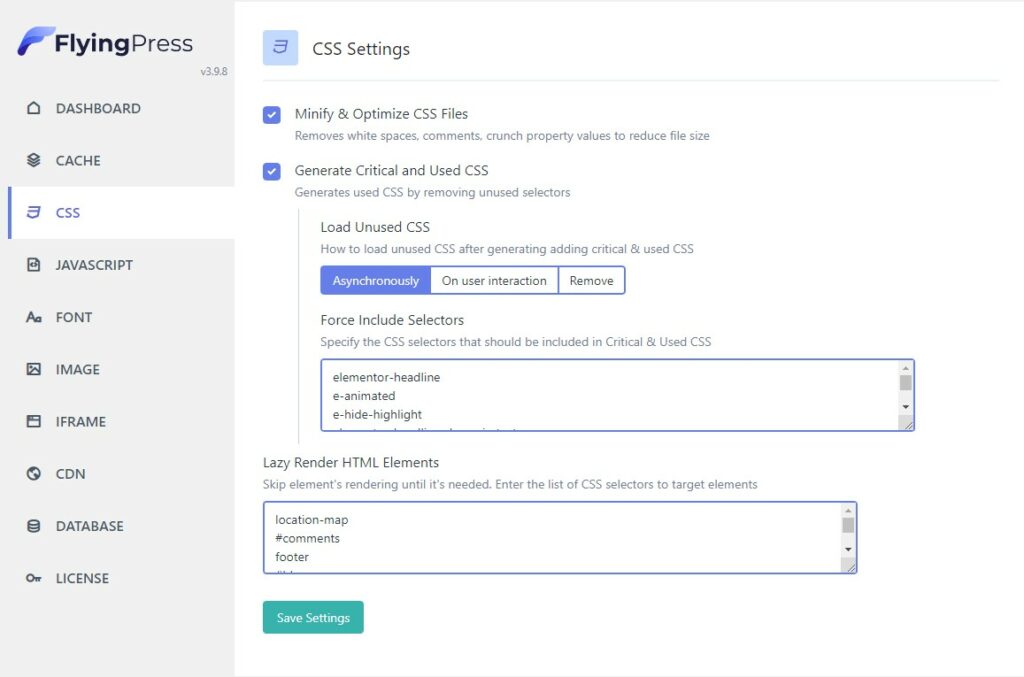
CSS Settings
- Enable Minify & Optimize CSS Files
This will reduce the CSS file sizes. - Generate Critical and Used CSS
This one takes some work to perfect but can have a HUGE impact on load speeds. - Load Unused CSS
Remove will give you the lowest file size, but it may cause display issues.
On-user interaction is the next step to try if Remove breaks your site.
Asynchronously is the safest bet. I usually go with this unless I’m trying to push the limits. - Lazy Render HTML Elements
This is where you’ll want to enter CSS selectors to lazy load in. A great example of this is usually your footer. I use it on home pages that have a few blogs featured at the bottom of the page.
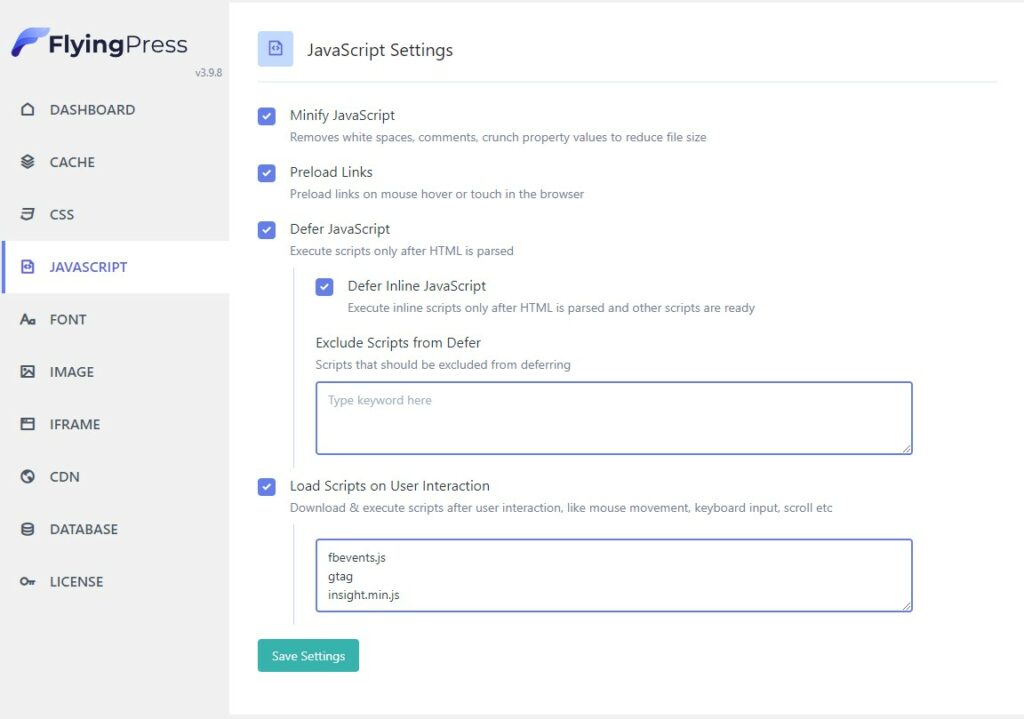
JavaScript Settings
- Enable Minify JavaScript
This will reduce the JS file sizes. - Enable PreLoad Links – Optional
This is good for page speed but can wreak havoc on a web server if you have tons of images and content. Run a test for a few days if you enable it. - Enable Defer JavaScript
This defers the loading of JavaScript after HTML is parsed. It can help with CLS issues. - Defer Inline JavaScript
- Load Scripts on User Interaction
This is the secret sauce. This is where you can delay loading anything that is not needed above the fold of the website. Usually, tracking scripts or any JS that isn’t in the header.
Font Settings
- Enable Optimize Google Fonts
I try to avoid using Google Fonts, but in the rare case you start using them, this can load every font and style locally, so you don’t have to do that manually. - Enable Display Fallback Fonts
Prevents font from loading slowly or flashing while your Google font is downloaded.
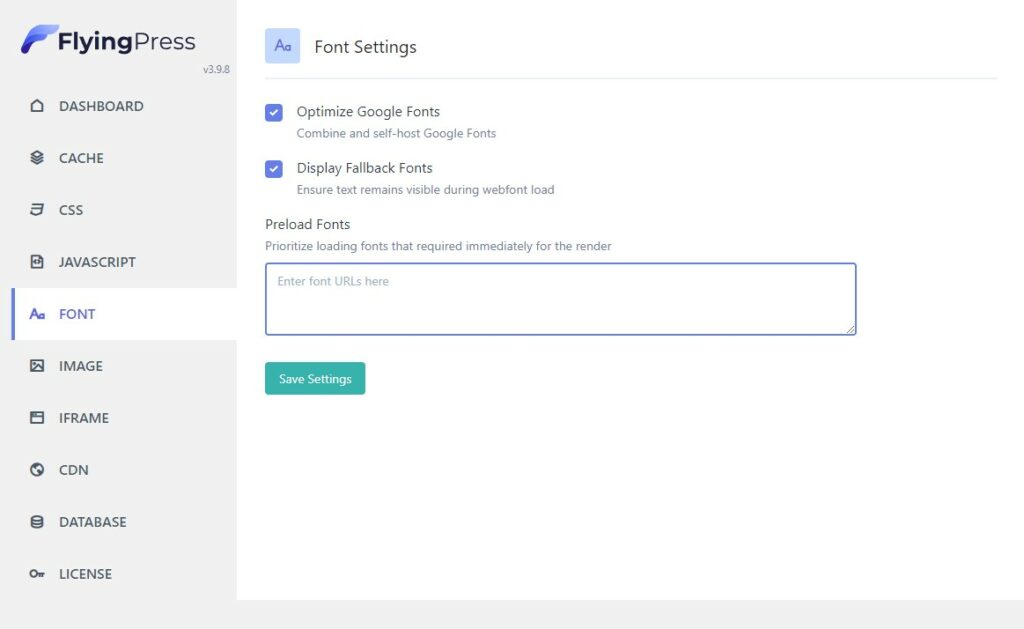
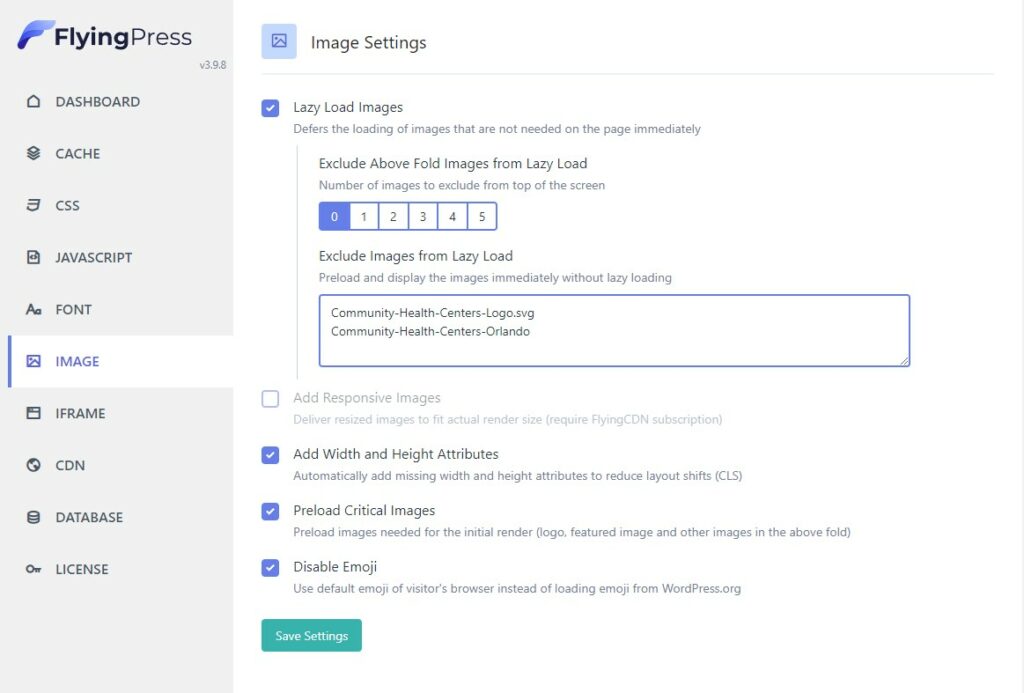
Image Settings
- Enable Lazy Load Images
You may be lazy loading images another way already or by default, but I’ve found leaving this checked gets the best results. Be sure to add any above-the-fold images to the Exclude Images from Lazy Load box. - Enable Width and Height Attributes
- Enable Preload Critical Images
- Enable Disable Emoji
When optimizing a website, it‘s important to adjust the base settings based on the complexity of the site and the other plugins and services being used. This may involve disabling certain features, adding custom code, or changing settings in the caching plugin.
Additionally, additional tweaks may be needed based on the type of content being served, the hosting environment, and the specific performance goals of the site. It‘s important to continually monitor the website’s performance and make adjustments as needed.